Robbie Thain
Founder, CEO

Six functional spatial zones and three visual sightlines optimize trade show booth traffic flow to maximize visitor qualification and conversion rates.
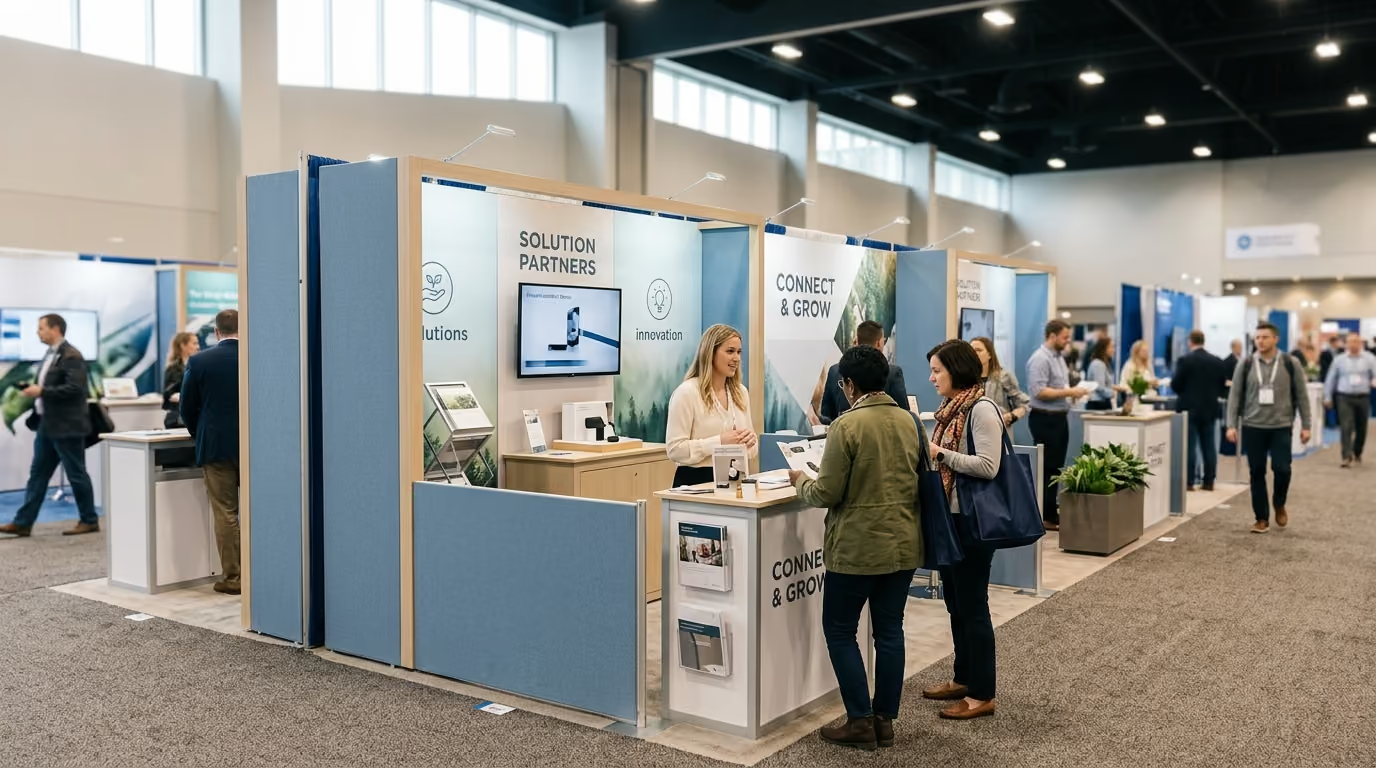
Exhibitors often spend hundreds of thousands of dollars treating trade show booths like decorative museum displays when they should be engineered as high-throughput qualification engines. Mastering physical layout and traffic flow transforms passive foot traffic into structured commercial conversations that generate measurable pipeline.
A successful trade show activation depends on aligning structural visibility, spatial zoning, and operational discipline with attendee psychology. By configuring your footprint around the rigorous stages of attraction, contact, and conversion, your field team can systematically capture demand while eliminating the physical congestion that drives qualified buyers away.
A standard expo floor is an environment of sensory overload, noise, and friction. Thousands of attendees walk narrow aisles lined with flashing screens, identical pop-up banners, and aggressive product pitchmen. Within this visual storm, most corporate exhibits fail before an attendee takes a single step across their perimeter. Visitors crowd near the front edges, glance at vague slogans, and keep moving because there is no clear path to step inside. Meanwhile, staffers huddle in defensive clusters around reception counters or retreat to back corners, checking mobile phones while high-value prospects walk right past. When an interested buyer does enter, they often bump into an unorganized product demo, get trapped behind a line for giveaways, or find themselves abandoned without a clear next step. This chaotic breakdown happens because brand teams design booths for static aesthetic appeal rather than active physical throughput.
To design a floor plan that reliably generates qualified pipeline, you must view trade show real estate through a validated behavioral framework. Academic research by Gopalakrishna and colleagues establishes that industrial exhibition performance relies on a three-stage funnel: attraction efficiency, contact efficiency, and conversion efficiency. Layout choices directly dictate how well an exhibitor moves attendees across each of these three distinct operational stages.
Attraction efficiency measures your ability to draw relevant attendees out of the main aisle and into your brand perimeter. It is influenced by vertical architecture, line of sight, and immediate value propositions that cut through ambient convention hall noise. A booth that looks crowded or closed off creates visual friction, prompting attendees to walk past rather than pause.
Contact efficiency defines how easily your booth staff initiates meaningful, diagnostic conversations with those who step inside. If your physical footprint forces staff to stand behind heavy counters or traps them in isolated back corners, contact efficiency drops immediately. Spatial layout must give field personnel clear sightlines and unobstructed movement paths to greet, qualify, and guide prospects without delay. You can read more about qualifying trade show visitors systematically to align your team's on-site behavior with this spatial movement.
Conversion efficiency measures how effectively your team moves engaged visitors into documented next steps, scheduled sales meetings, or closed commercial agreements. If your floor plan lacks dedicated zones for detailed discussions or buries lead capture tools in high-traffic walking lanes, promising interactions evaporate before staff can secure concrete follow-up commitments. Layout is the physical foundation that makes high conversion rates possible.
Trade show attendees make split-second navigational choices based on what they see as they move through the venue. Research by Bauer and Hantel published in the Journal of Convention and Event Tourism examined visual attention on exhibition floors using eye-tracking technology across both laboratory and live event settings. Their findings provide empirical clarity on which structural components capture visual fixations and hold attendee gaze.
In the live field study, overhead structural towers captured the highest visual engagement, averaging 8.87 fixations and 2.51 seconds of total fixation time. Overhead canopies also performed well, recording 4.66 fixations and 1.09 seconds of fixation time. Furniture inside the space drew 4.40 fixations and 1.41 seconds of attention, functioning as an invitation to engage once visitors drew closer. Flat wall graphics and text averaged 3.35 fixations and 1.09 seconds, while flooring captured the lowest visual attention at just 0.44 fixations and 0.08 seconds.
Bauer and Hantel also discovered that visual structures like towers and canopies dominated recall far more than the specific text printed on them. Attendees remembered the presence of bold architectural shapes, but often failed to recall complex sentences written on high surfaces. This empirical reality means your booth must function as a three-distance visual communication system.
At long range, attendees scan above the crowd to orient themselves within the exhibition hall. High structural towers, hanging signs, and canopy architectures serve as primary navigational anchors. These elevated structures must communicate your core brand identity through bold shapes, high-contrast logos, and signature lighting. Avoid cluttering overhead elements with dense explanatory taglines that cannot be read from across the room.
As visitors approach your specific aisle, their focus drops to eye level. This medium-range perspective requires clear, concise positioning messages that explain exactly what your product or service accomplishes. The messaging should sit prominently on vertical surfaces between five and eight feet from the floor, where passing foot traffic can digest it in seconds. This is where strategic trade show booth graphics and signage must clearly answer what your company does and why the visitor should stop.
Once an attendee reaches your booth perimeter, their gaze shifts downward toward physical interaction points. Furniture, touchscreens, product staging areas, and live demonstration counters dominate short-range visual attention. These elements must present an immediate, frictionless invitation to step off the polished concrete aisle and onto your booth carpet. Clear physical pathways must lead directly to these hands-on discovery zones.
A productive booth layout organizes commercial activity into distinct operational zones. Rather than treating your square footage as a single open room, divide the floor plan into six sequential environments. Each zone serves a specific behavioral purpose and supports a progressive increase in visitor commitment.
The threshold is the transition line between the busy public aisle and your branded environment. This zone must remain open, inviting, and free of physical barriers. Never place bulky reception desks, prize wheels, or literature racks directly on this boundary line.
The threshold must offer enough open space for an attendee to pause, assess the space, and step inside without blocking the flow of aisle traffic. Position friendly, standing brand greeters just inside this perimeter to welcome visitors and make immediate verbal contact. Greeters should observe incoming traffic, initiate short diagnostic introductions, and direct prospects deeper into the footprint.
Directly past the threshold, the orientation zone helps visitors quickly understand the breadth of your offering. This area uses high-impact visual displays, self-guided digital kiosks, or curated product displays to answer basic questions. It allows self-directed visitors to explore at their own pace without feeling pressured by an aggressive sales pitch.
Keep explanatory copy brief and scannable in this zone. Digital touchscreens should feature intuitive, rapid navigation paths that present product categories in three clicks or fewer. The orientation zone acts as a natural sorting station, separating casual passersby from qualified prospects who need detailed attention.
The demonstration area is the active engine of your booth. Research by the Center for Exhibition Industry Research (CEIR) highlights product showcases and hands-on learning as fundamental drivers of attendee engagement across North American exhibitions. A great demo zone must be designed around spatial capacity and viewing geometry rather than mere equipment placement.
When planning this space, calculate how many attendees can comfortably watch a demonstration at one time without spilling back into the primary aisles. Establish dedicated standing positions for active participants and separate viewing sightlines for casual observers. For food, beverage, and physical product brands, engineering demo-centric booth experiences ensures high trial volume while keeping traffic circulation fluid. Provide clean disposal stations and ample counter space so demonstrators can reset equipment quickly between cycles.
Once a prospect validates their interest in the demonstration area, staff should transition them to the conversation zone. This environment provides the physical space and acoustic separation needed for detailed commercial discussions. Depending on your booth size, this zone can range from high-top standing tables to semi-private seated lounges.
Keep conversation furniture away from the noisy perimeter and main walking paths. Seated areas should use sound-dampening architectural elements, such as acoustic wall panels, felt dividers, or dense carpeting with premium padding. Lowering ambient noise helps buyers focus on complex technical discussions, pricing models, and contract terms without distraction.
Lead capture should never be treated as an isolated, transactional gate at the front entrance. Capturing contact data belongs naturally at the conclusion of a successful product demonstration or commercial conversation. The conversion zone must be equipped with the physical tools and digital workflows required to log detailed prospect data quickly.
Provide staff with dedicated tablet docks, comfortable counter space, and reliable charging stations. Design the physical space so a staff member can complete qualification notes while the visitor stands or sits comfortably beside them. Ensure this administrative task does not block other visitors from entering the conversation or demo areas.
Operational clutter destroys booth professionalism faster than poor graphics. Literature boxes, shipping crates, staff coats, extra product inventory, and trash bags must remain hidden from view at all times. A dedicated, lockable storage room or enclosed perimeter closet is a mandatory operational requirement for every trade show footprint.
Position storage access doors along low-profile side walls rather than main visitor thoroughfares. Staff should be able to retrieve restocking inventory, marketing collateral, or clean glassware without interrupting attendee movement. In our experience across more than 1,000 campaigns in all 50 states, booths that lack integrated storage quickly degrade into disorganization, slowing down staff and diluting brand authority.
A high-performing trade show layout balances commercial throughput with safe, accessible movement for every attendee. Physical bottlenecks occur when high-traffic features are clustered too close together, causing crowds to back up and choke off circulation paths. Careful dimensional planning keeps your booth compliant with federal accessibility guidelines while maintaining open, comfortable visitor flow.
Exhibition spaces must adhere to the accessibility mandates established by Title III of the Americans with Disabilities Act (ADA). The Department of Justice ADA Title III regulations require all public accommodations and commercial exhibits to maintain continuous, unobstructed accessible routes. The 1991 and 2010 ADA Standards for Accessible Design establish clear physical dimensions that every booth designer must incorporate:
Designing for accessibility improves circulation for every visitor. Wide pathways, clear sightlines, and accessible countertop heights naturally reduce congestion and create an inviting atmosphere across the entire footprint.
Examine your floor plan blueprint to identify potential pinch points before shipping hardware to the convention center. Common layout errors include placing product sampling stations directly adjacent to main entrance corners, setting up narrow two-foot walkways between display cases, and positioning registration tables right at the aisle edge.
When planning layouts for food and beverage activations, design specialized staging areas that support both high-volume consumer trials and private commercial negotiations. If you are balancing fast sampling with executive discussions, review how brands approach designing spaces for product trials and retail buyer meetings to avoid spatial collisions. Maintain at least four to five feet of clearance around all active demonstration stations to accommodate standing spectators without constricting internal walkways.
The three-stage performance model shows that booth staff numbers and operational training directly govern contact and conversion efficiency. A brilliantly engineered booth layout will fail if your staff does not know how to occupy and navigate the physical space. Staff positioning must be planned with the same geometric precision as your architectural walls and lighting trusses.
The most common staffing mistake is placing team members behind a long counter at the front of the booth. This creates a physical and psychological barricade that discourages visitors from crossing the threshold. Staff members naturally lean on the counter, group together in private conversations, and wait passively for attendees to approach them.
Ban reception counters at the booth perimeter unless your specific activation requires an active check-in station. Require staff to stand in open, active postures within the threshold and orientation zones. Position team members at forty-five-degree angles toward incoming aisle traffic rather than squaring off directly in front of approaching visitors. This open stance feels welcoming, allows eye contact, and makes stepping into the booth feel natural.
Implement a clear physical handoff protocol to keep visitors moving smoothly across your functional zones. Booth staff should operate in specialized, coordinated roles rather than attempting to handle every step of the commercial interaction alone:
When a greeter identifies a qualified buyer, they should physically guide the prospect into the orientation or demonstration zone and introduce them directly to a specialist by name. This physical transfer prevents prospects from wandering away and maintains continuous conversational momentum. You can train your team on smooth conversational transitions using proven field conversation scripts designed for live event staff.
Translating a two-dimensional architectural blueprint into a functional, high-conversion trade show environment requires strict operational execution. Follow this systematic playbook before, during, and after the exhibition to maximize spatial efficiency and team performance.
Measuring the success of your trade show footprint requires tracking physical movement and interaction depth alongside traditional commercial metrics. Industry benchmarks provide valuable baseline data on how attendees interact with physical spaces. An industry report by Exposure Analytics analyzed physical movement data across 43.8 million visitors at roughly 3,000 live events from 2020 through 2026. Across 9.6 million measured exhibition visitors, the analysis recorded an average physical engagement rate of 39.7 percent, with engaged visitors spending an average dwell time of 16 minutes and 54 seconds within the activation space.
While broad benchmarks reflect varied event formats, every exhibitor should track a balanced scorecard of lead and lag metrics to evaluate their physical layout and drive continuous Return on Investment (ROI) improvements.
A high-growth ready-to-drink beverage brand secured a premium twenty-by-twenty-foot island booth at a major national food and beverage trade show. Their primary goal was securing distribution agreements with regional grocery buyers while generating consumer trial volume.
In their initial configuration, the brand positioned a massive, rectangular sampling bar across the front perimeter of the booth. Two giant video walls framed the sides, and a small, four-person meeting table sat directly behind the sampling bar.
The initial setup caused immediate operational failure:
Recognizing the spatial breakdown, the team restructured the layout overnight into a four-sided, high-efficiency functional system:
The team split the front sampling bar into two separate, compact demonstration pods located on the east and west corners of the north perimeter. This opened a wide, eight-foot central gateway that allowed attendees to step freely into the center of the booth without causing an aisle bottleneck.
They converted the central core of the booth into a fully enclosed, lockable storage closet. This structure concealed messy beverage cases, ice coolers, and backup glassware while acting as a visual and acoustic partition.
Behind this central storage core, facing the quieter south aisle, the brand established a dedicated B2B commercial zone. This area featured an acoustic meeting lounge with comfortable high-back chairs and an interactive retail display station showing sell-through data, margins, and planograms. Brand ambassadors at the front demonstration pods were trained to identify retail buyers, hand them a signature beverage sample, and immediately escort them along the perimeter pathway into the quiet B2B lounge.
The layout modification delivered immediate commercial results over the remaining two days of the expo:
Treating trade show real estate as an interconnected, functional engine turns high-friction expo chaos into an orderly, measurable sales pipeline. When physical architecture, accessible visitor flow, and staff positioning work in complete harmony, your trade show presence becomes a repeatable driver of commercial growth.
Strategic trade show booth design is not about decorating a static room, but about engineering an active commercial environment where physical movement drives qualified business conversion.

30 Years Experiential & Retail Activation Partner for CPG & Beverage Brands | Multi-Market Demos, Roadshows & Costco/Club Programs That Actually Sell